|
Lesson 6Image Adjustments
There are lots of adjustments that you can perform in Adobe Photoshop some are very simple and useful, others are more complicated and less useful. Here we will go through the Mose useful ones and show you some easy ways to work on your images. For each of these techniques there are several ways of doing the same adjustment, we will go through a very simple way but as your technique improves and you become more familiar with Photoshop you may progress on to some of the other ways to achieve this effects. |
Photo Editing Software
Basic Adjustments
There are lots of adjustments that you can perform in Adobe Photoshop some are very simple and useful, others are more complicated and less useful. Here we will go through the Mose useful ones and show you some easy ways to work on your images. For each of these techniques there are several ways of doing the same adjustment, we will go through a very simple way but as your technique improves and you become more familiar with Photoshop you may progress on to some of the other ways to achieve this effects.


|
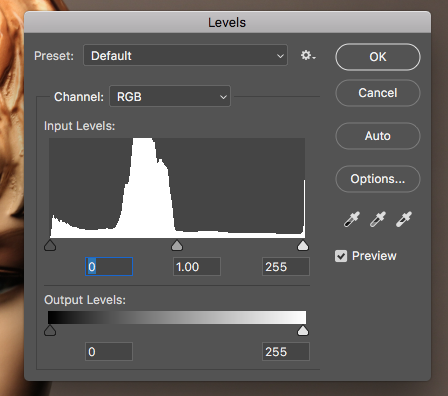
Levels
Probably the most important of all the adjustments you will make. Levels simultaneously changes the brightness and the contrast of your image.Levels modify the tonal values in an image by adjusting the levels of the shadows, midtones, and highlights. Using just a touch of levels will go a long way in correcting your images. In this one panel you can make the blacks blacker, or the whites whiter by sliding the small triangles under the graph. To access the Levels menu click Image / Adjustment / Levels 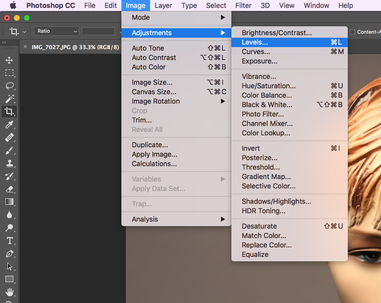
|
|
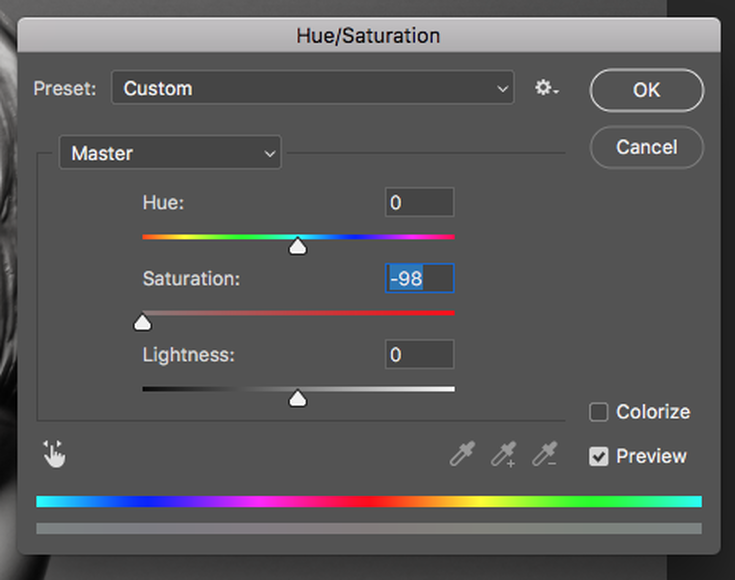
Hue/Saturation
Hue / Saturation lets you adjust the hue, saturation, and lightness of your entire image or in a specific range of colours in your image. It’s usually better to not affect saturation on an entire image — doing this reduces the overall tonal range. Instead try affecting the saturation of specific colors in your image to have greater control over your image editing. This tool is also good for colorizing grayscale images. Image / Adjustment / Hue/Saturation 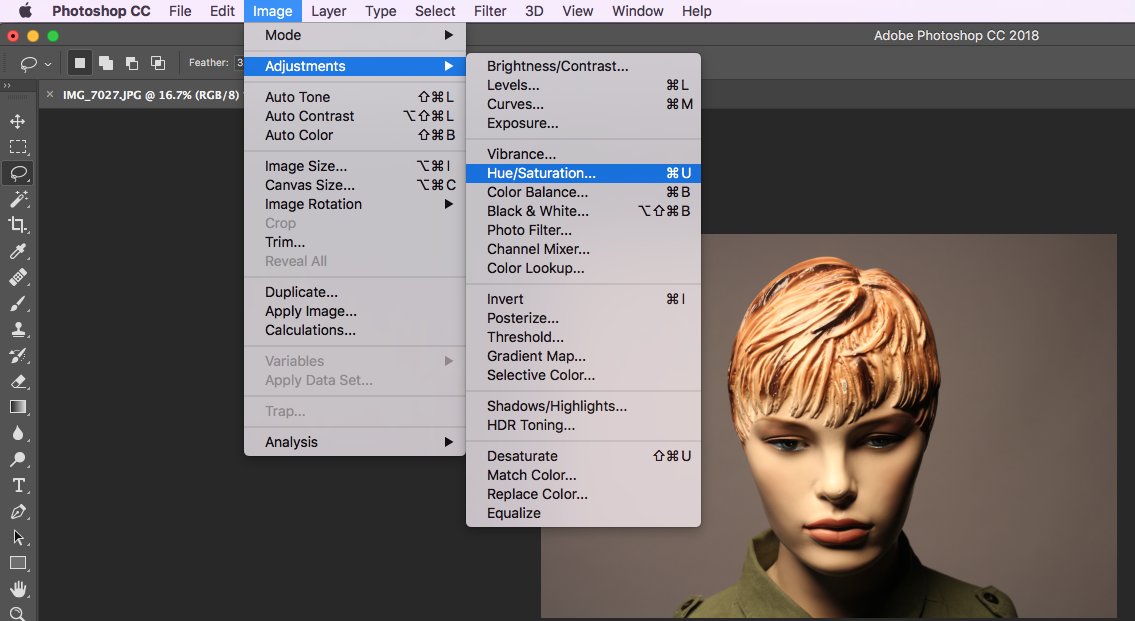
|
|
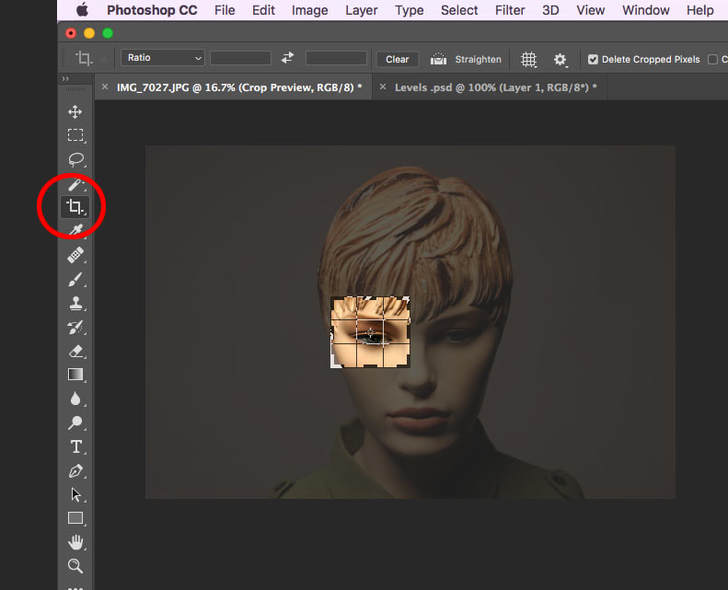
Cropping
This changes the number of pixels in an image by "cropping" away the pixels from the surrounding area.To crop an image with the Crop tool, follow these instructions: Step 1. Choose the Crop tool from the Tool Panel Step 2. Bring the cursor to a point on the image, where a corner of the cropped image will be, and click the mouse. Step 3. Moving the cursor diagonally, keep the left mouse button pressed. Step 4. Release the left mouse button. A box will appear over the image with marked corners, indicating the area that will be preserved. This box can be moved, resized, and rotated.
|
Photo Editors
There are many photo editors available some are expensive but many are free. Here are some of the best ones out there.
There are many photo editors available some are expensive but many are free. Here are some of the best ones out there.


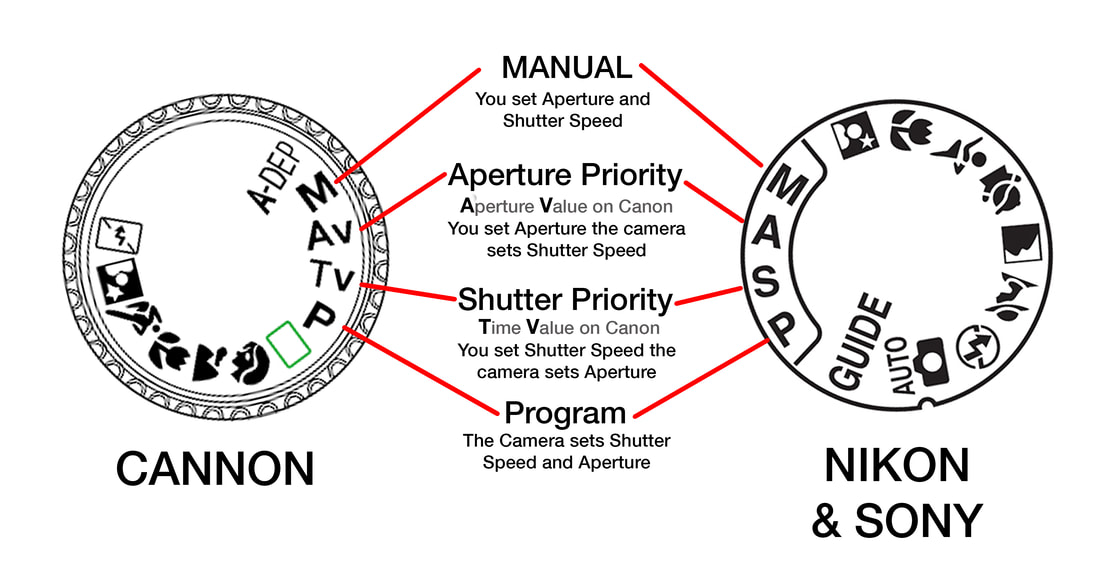
How to set up your camera
If you are having problems making this work make sure your camera is set up correctly. This may mean you have to get out your manual to find out how to change your settings but it will be worth it. Make sure your camera is set to focus on the centre spot and lock focus. On most cameras this is called One Shot
Share Your Best Images
Take time to share with the group a couple of you images from the "In and Out of Focus" project. Perhaps you are particularly pleased with some of your results, or perhaps something went specularly wrong and you don't know why. Either way it helps everyone if we share our High points and a low point so we can all learn together. Click on the link to the shared Google Photos folder and upload a few images to get the conversation started.